Admin Guide: Enabling Advanced Group Analytics (Looker)
Data-driven decision-making is now available at the group level! With our Looker Integration, Group Owners can access deep-dive analytics—such as engagement trends, member activity, and content performance—filtered specifically to their own group's data.
Follow these steps to initialize and enable the Advanced Analytics tab for your groups.
🛡️ Pre-Requisites
📌 Before you begin, ensure your organization meets the following criteria:
-
Feature Flag: Your workspace must have the Advanced Analytics feature enabled. If you do not see these options, please contact your Haystack CSM.
-
Admin Access: You must be a Workspace Administrator to edit group navigation.
-
Ownership Check: 🆘 Critical Note: To view the dashboard, the user (including Workspace Admins) must be explicitly added as a "Group Owner" to that specific group.
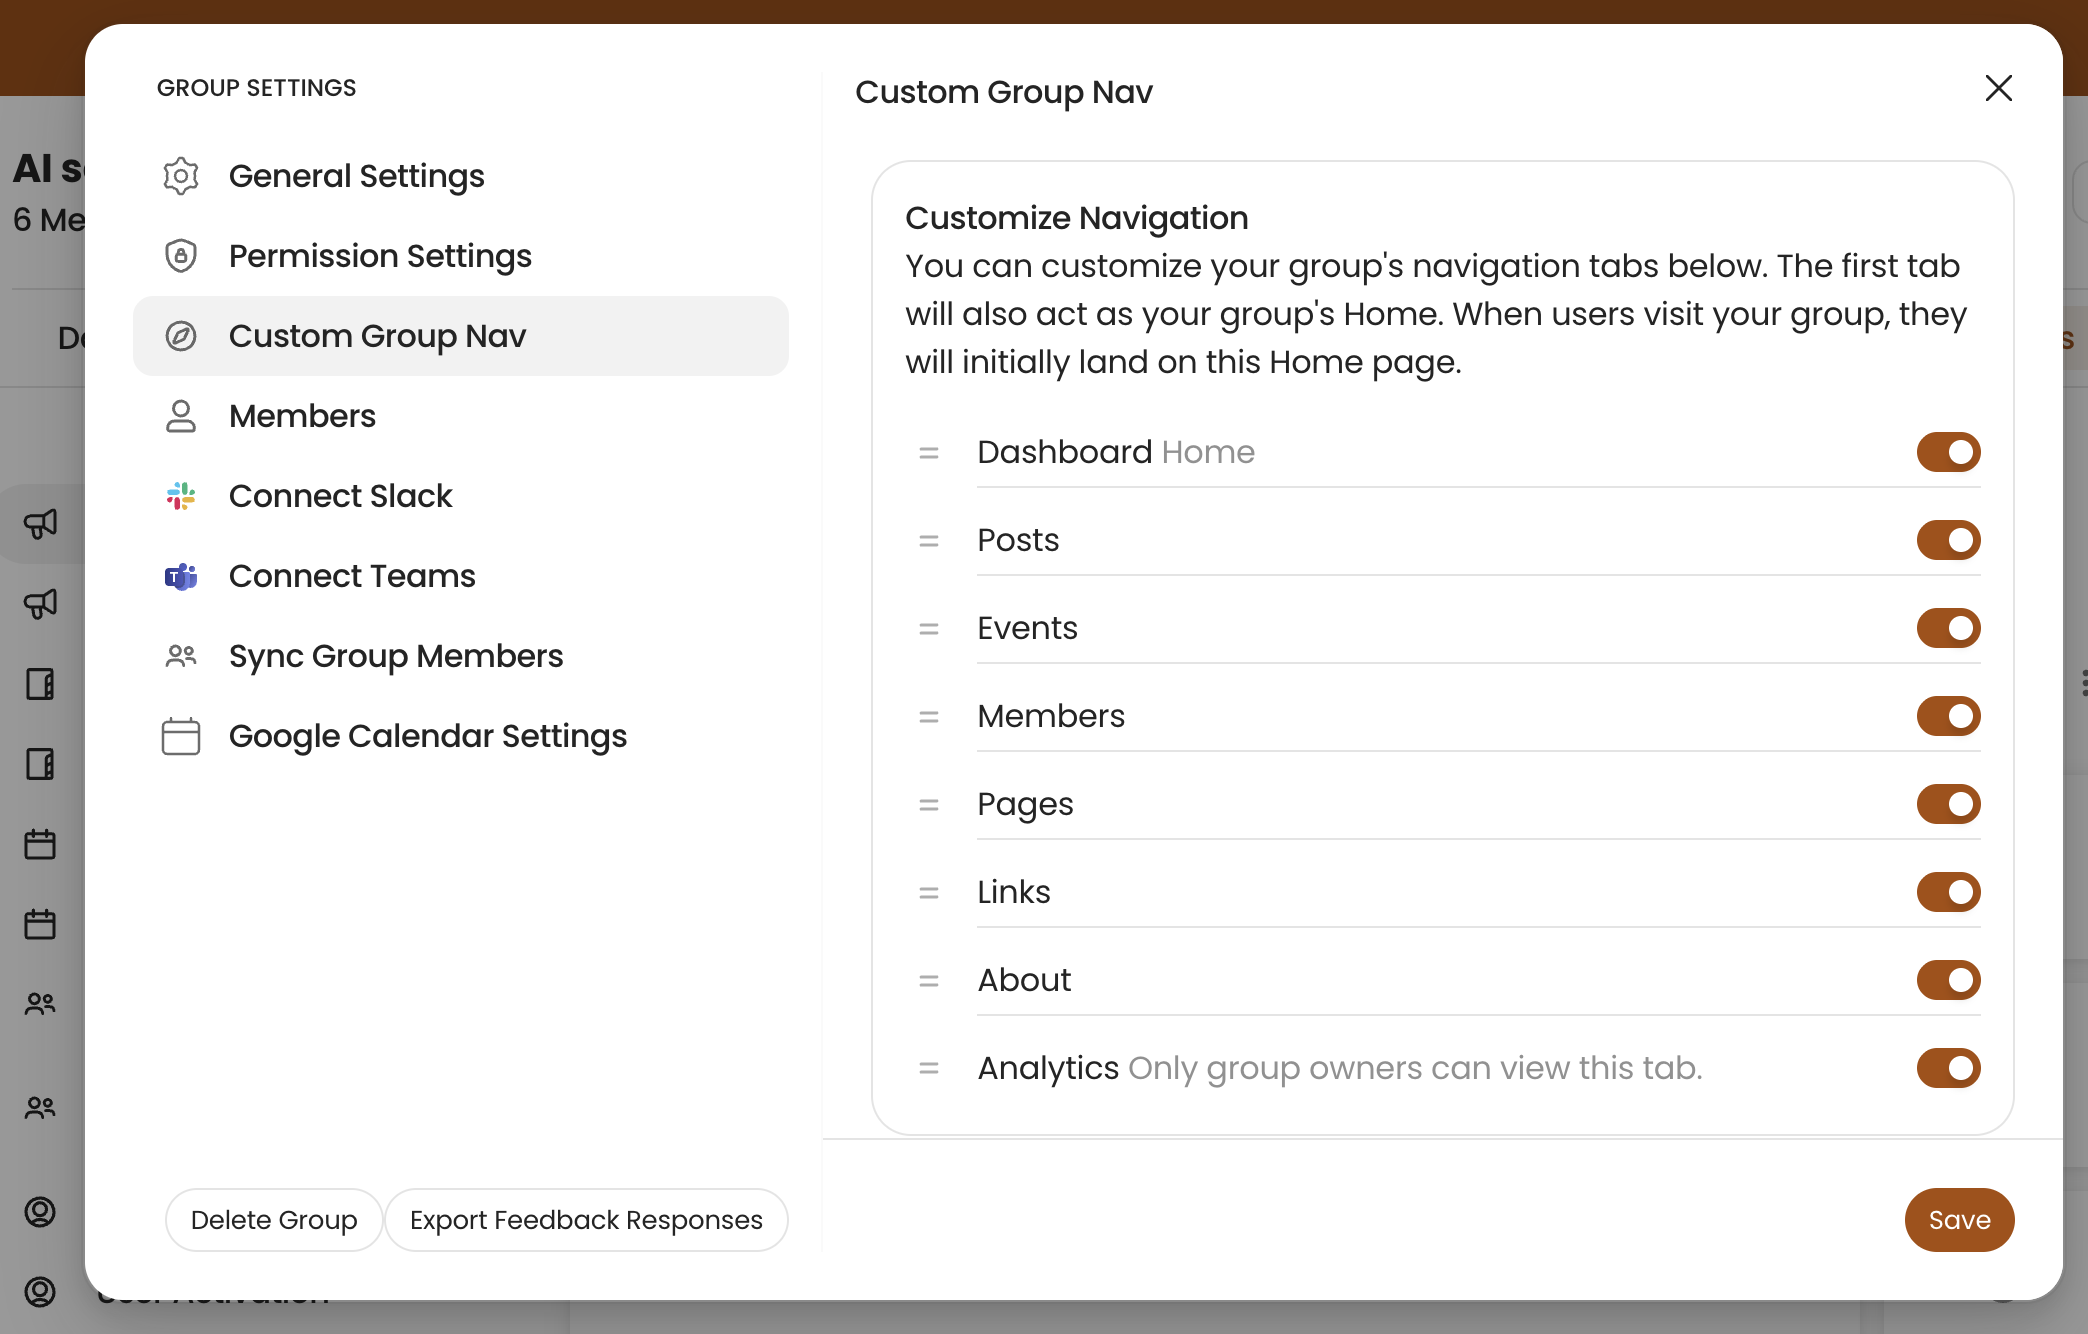
Step 1: Add the Analytics Tab to Group Navigation
By default, the Analytics tab is hidden to maintain a clean interface. To enable it for a specific group:
-
Navigate to the Group Page where you want to enable analytics.
-
Click on the Drop Down Arrow in the upper right hand corner and select Settings (Gear Icon).
-
Click on "Custom Group Nav" on the left hand side.
-
Locate Analytics in the list of available tabs. Only group owners can view this tab.
-
Toggle the switch to ON.
-
Click Save Changes.
Step 2: Assign Group Owners
Because Looker dashboards are filtered by permissions, the platform needs to know exactly who should see the data.
-
While still in the Group Settings, go to the Members tab.
-
Search for the user(s) who need access to the data.
-
Ensure their role is set to Group Owner. You can click on the [...] at the right hand end of the column to update their role.
-
Note: Even if you are a Workspace Admin, you will see a "Permission Denied" error inside the Looker iframe if you are not also a Group Owner of that specific group.
-
Step 3: Accessing the Dashboard
Once the tab is active and permissions are set:
-
Close out of the settings and return to the Group Home Page.
-
You will now see an Analytics tab in the horizontal navigation menu (usually next to "About" or "Members").

-
Click the tab. The Looker dashboard will load within an iframe, automatically filtered to show data only for that specific group.
📊 What’s Inside the Group Dashboard?
Group Owners will now have access to high-level visualizations, including:
-
Member Growth: Track how your group's population is changing over time.
-
Content Reach: See which posts, pages, and events within your group are generating the most views and reactions.
-
Engagement Heatmaps: Understand which days of the week your group members are most active.
-
Export Capabilities: Like our Workspace-level analytics, Group Owners can often download specific data tiles as CSVs or PDFs for internal reporting.
💡 Troubleshooting Tips
-
"I see a blank screen or a sign-in error": Ensure you are logged into the platform. If the issue persists, verify that the "Advanced Analytics" feature flag is still active in the Admin Console.
-
"The data looks empty": If the group was recently created, it may take up to 24 hours for the first nightly sync to populate the BigQuery tables that power these dashboards.
-
"I am an Admin but can't see the tab": Double-check Step 2. You must be a member of the group with the "Owner" role assigned.
Keywords: Looker, Advanced Analytics, Group Owners, Data, Dashboards, Group Navigation, Metrics, Reporting.