![Logo (Black Text)-1.svg]](https://support.haystackteam.com/hubfs/Logo%20(Black%20Text)-1.svg)
📍 Jump to a Section
- Why Use Auto-Archiving for Events?
- How to Auto-Archive Events During Creation
- How to Retroactively Auto-Archive Events
- How to Restore Archived Events
- Best Practices for Event Auto-Archiving
Why Use Auto-Archiving for Events?
- Saves Time: Eliminates the need to set calendar reminders to manually take down past events.
- Keeps Calendars Clean: Prevents employees from getting distracted or confused by past events appearing on active company feeds or calendar views.
- Improves Search Accuracy: Guarantees that search queries for company gatherings prioritize upcoming events rather than old listings.
- Preserves Event Records: Moves past event details safely to an admin archive folder without permanently deleting any data.
🔒Permissions Needed: All users in the system can set and edit an auto-archive date on their own posts. Workspace admins and post admins can edit the auto-archive date on all posts in the system. Group owners can edit the auto-archive date on posts in their group if they have post publishing permissions within the group.
- Choose "Create" in the top of your dashboard panel and then "Create Event" and select which group the event goes in.
- Start creating an event as you normally would by entering your title, date, time, location, and description.
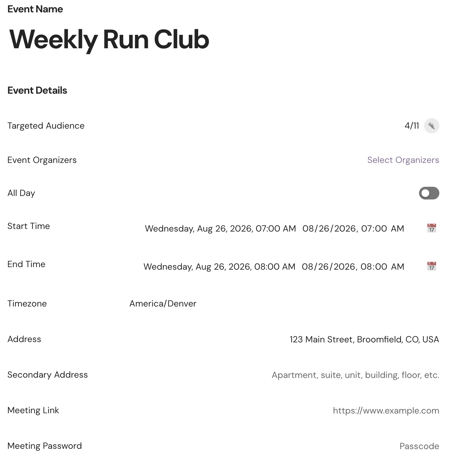
- Click Continue to move to edit the image, title and content. Once done, select "Continue" in the upper right hand corner.
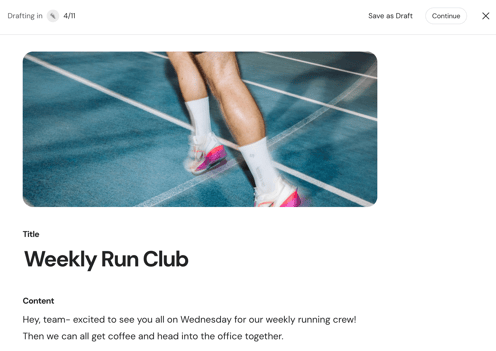
- On the Event Preview Page, locate the Auto-Archive setting in the publishing panel. Select your desired Date and Time for the event to automatically archive. (Tip: We recommend setting this for 24–48 hours after the event ends).
- Click Publish your event as usual and it will auto-archive itself!
How to Retroactively Auto-Archive Events
📌 Note: You need to be either the Event Creator, a Workspace Admin or an Event Admin to do this.
- Navigate to the published event you wish to update.
- Click the three dots (...) menu icon on the event and select Edit.
- Click through the Create Event setup page and the Content page to reach the Event Preview page.
- On the Event Preview page, locate the Auto-Archive date picker.
- Select or update your desired archive date and time.
- Click Save Changes (or Update). Your event will now automatically move to the archives on the newly selected date.
🔄 How to Restore Archived Events
If an event was archived by mistake or you need to reference past event details, you can easily bring it back:
- Navigate to your main Haystack Dashboard.
- Click the drop-down arrow (˅) next to the Create button at the top of the screen.
- Select Archived from the menu to open your archive list.
- Choose "Events" from the top options. Filter or scroll to locate the event you wish to restore.
- Click the three dots (...) icon on the right side of the item.
- Select Restore.
Best Practices for Event Auto-Archiving
- ⏳ Add a Post-Event Buffer: Set your archive date for 1–2 days after the event finishes. This allows attendees time to log in after the event to access follow-up links, slides, or recap notes.
- 🛡️ Archiving Is Not Deleting: Rest easy knowing that archiving an event preserves all event details and guest records in your admin archives for future reference.
- 📅 Make it a Habit: Set the auto-archive date on the Event Preview Page every single time you build a time-bound event so you never have to think about manual cleanup again.
💬 Need More Help?
We're here for you! If you run into any issues or have questions about auto-archiving events:
- 💬 In-App Support Chat: Click the support icon in the bottom corner of your screen to chat with our team in real time.
- ✉️ Email Us: Send an email to support@haystackteam.com and we can assist you.
Keywords: auto archive, events, event calendar, content management, archived events, event preview, restore archived content, workspace management, event settings, haystack guides